How to Enable Virtual Touchpad on Windows 11
Need a virtual touchpad on your touchscreen tablet or laptop? Here is how you can enable virtual precision touchpad on Windows 11.

The virtual touchpad is a feature that has been introduced in Windows 10 to help users who use their laptop as a tablet to control the mouse cursor for a precise pointing task. It supports all multi-touch gestures as a physical precision touchpad including three-fingers and four-figures gestures. In this article, we’ll show you how to enable or disable the virtual touchpad on Windows 11.
Enable Virtual Touchpad on Windows 11
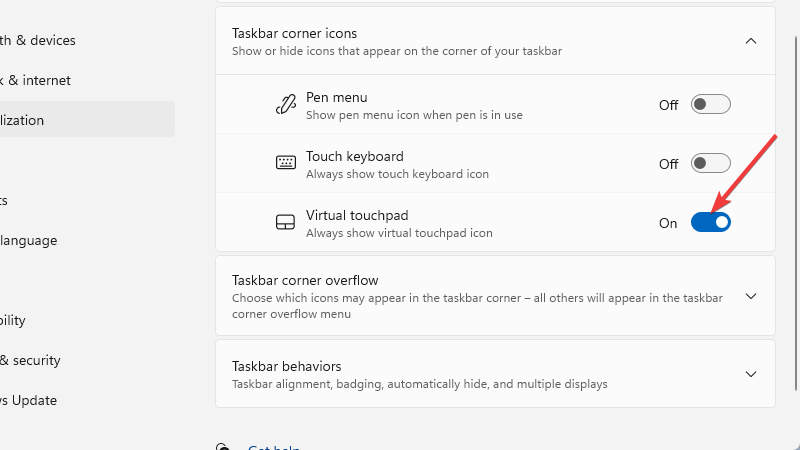
To enable the virtual touchpad on Windows 11, first, you need to show the virtual touchpad icon on the taskbar. To do so:
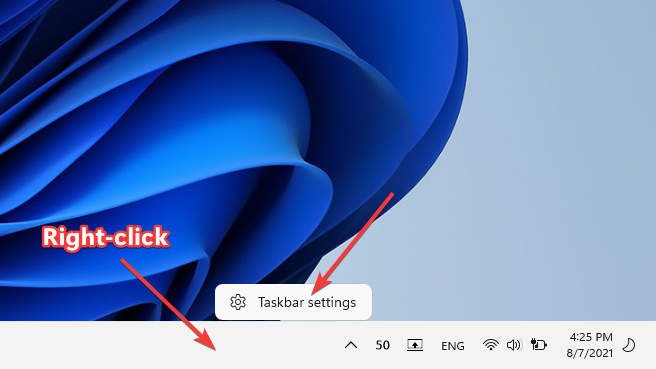
- Right-click the “Taskbar” and select “Taskbar Settings”.

- On “Taskbar” settings page, turn on the “Virtual touchpad” option to always show virtual touchpad icon on taskbar.

- From now you can enable virtual touchpad by clicking on the virtual touchpad icon on the taskbar.

Disable Virtual Touchpad on Windows 11
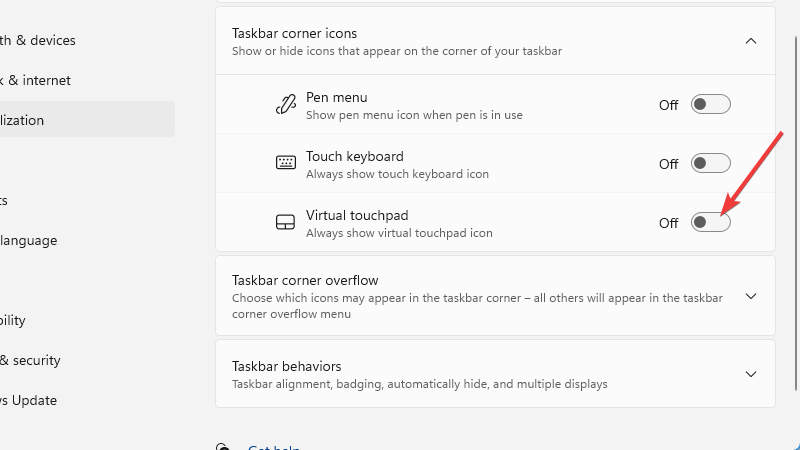
In case you don’t need the virtual touchpad and want more space in the taskbar, you can hide the virtual touchpad icon by:
- Right-click the “Taskbar” and select “Taskbar Settings”.
- On “Taskbar” settings page, turn off the “Virtual touchpad” option to always hide virtual touchpad icon on taskbar.
- From now the virtual touchpad icon will no longer appear on the taskbar.