How to Disable Touchpad Automatically When a Mouse is Connected on Windows 11
Here is how to automatically disable the built-in touchpad when a mouse is connected to your laptop on Windows 11 without software.
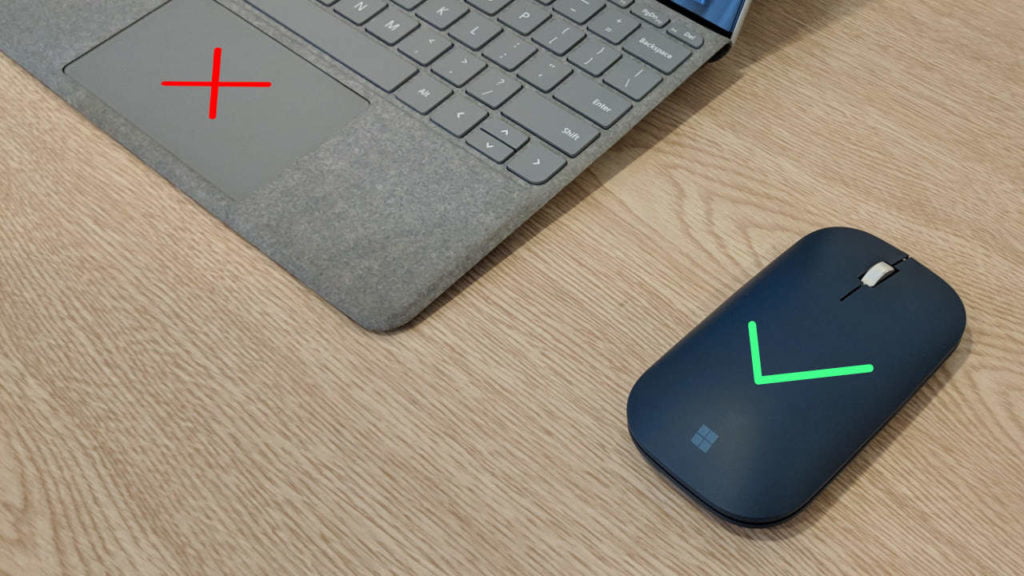
A touchpad is a crucial Input device that is mostly available on all laptops to control the mouse pointer on Windows as well as other OS with GUI support. However, some users prefer using a mouse over a touchpad especially for gaming and graphics or video editing. If you do too, you might want to disable the touchpad when you’re using a mouse to prevent accidentally click issues caused by the touchpad.
Previously, the feature that allows you to automatically disable the built-in touchpad was only available on some OEMs or specific laptop models. Now, Windows 11 has this built-in feature. And in this article, we’ll walk you through how to automatically disable a built-in touchpad when a mouse is connected to your PC on Windows 11.
Disable Touchpad When a Mouse is Connected
To automatically disable touchpad when a mouse is connected to your PC on Windows 11:
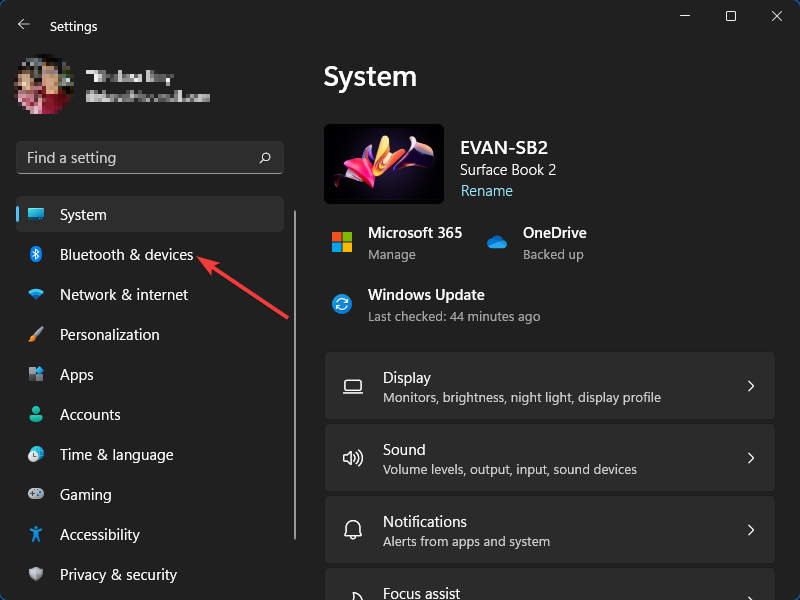
- Open the Settings app on your PC or you can use the “Win + I” shortcut key.
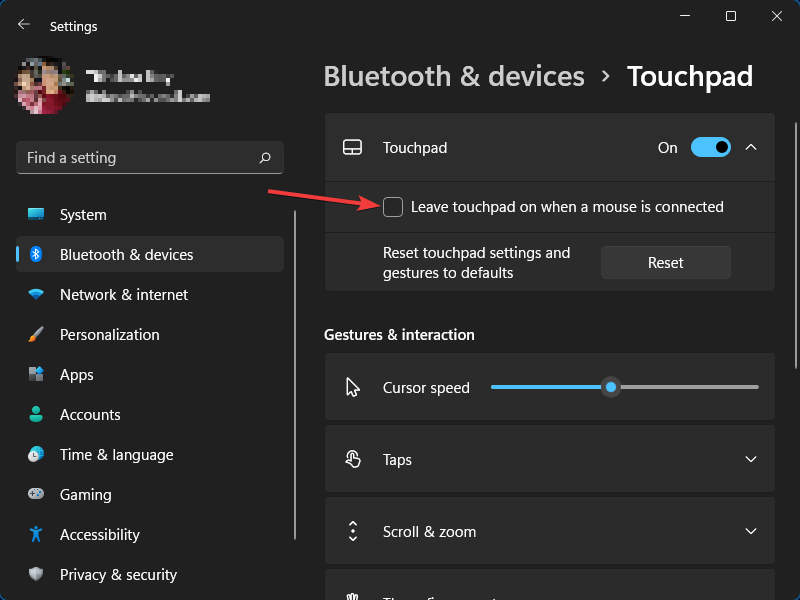
- On the Settings app, from the left sidebar, select “Bluetooth & devices”.

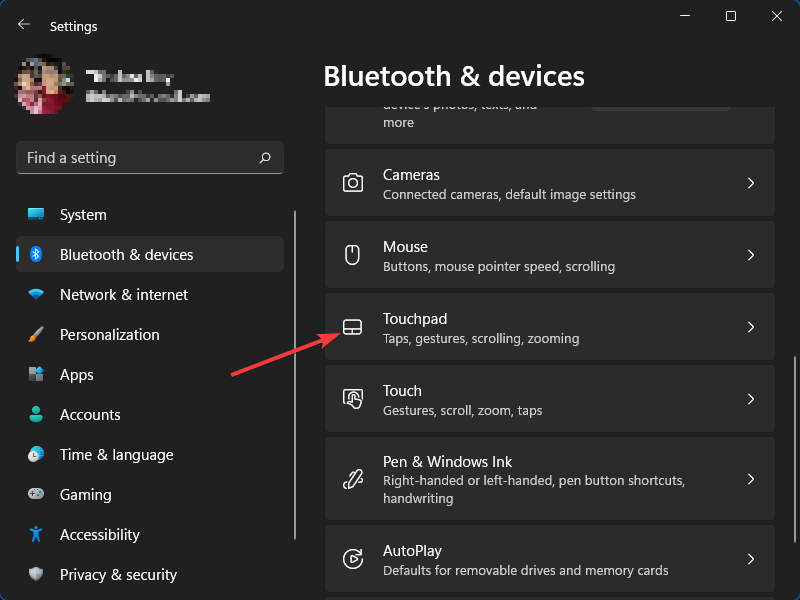
- On the “Bluetooth & devices” page, select Touchpad.

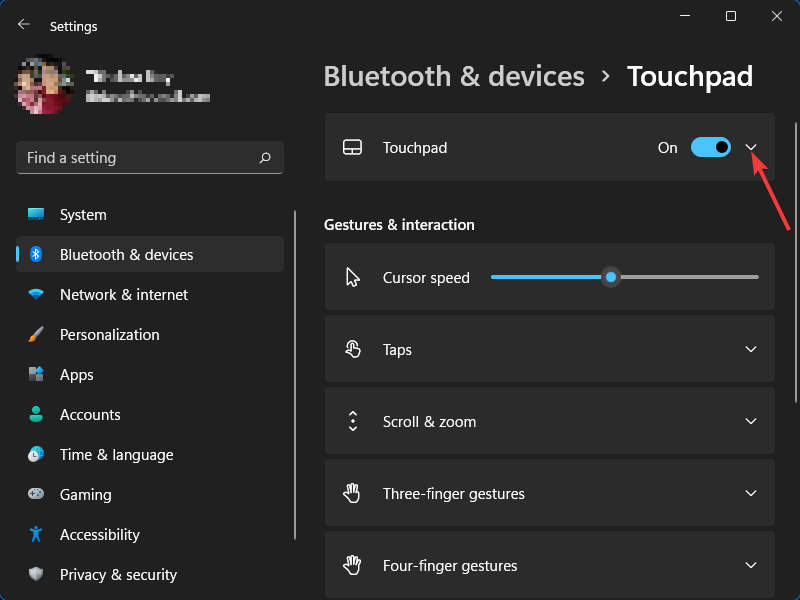
- On the “Touchapd” page, expand options for Touchpad by clickling on the Expand button.

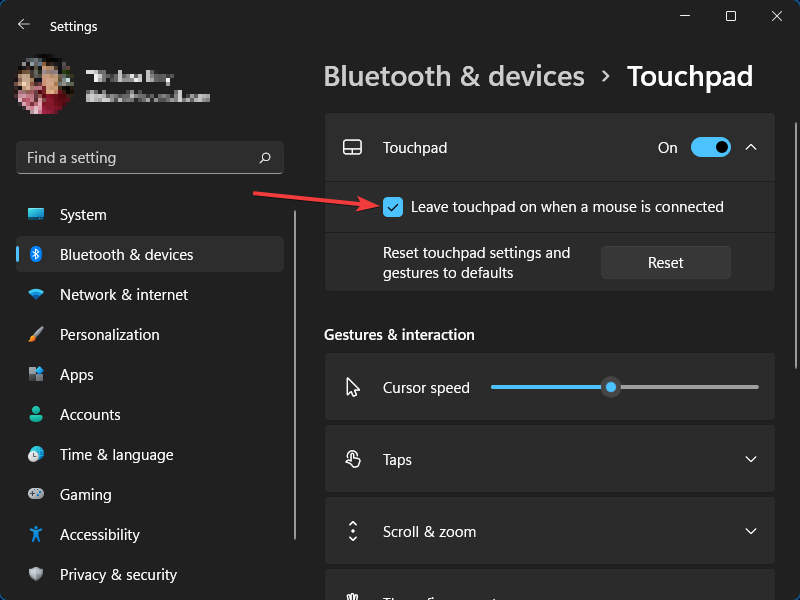
- When the touchpad options is expanded, Uncheck the option “Leave touchpad on when a mouse is connected“.

- Now your touchpad will be disabled if you’re currently connected or using a mouse.
Keep Touchpad Enabled When a Mouse is Connected
If you prefer to use both touchpad and mouse at the same time:
- Follows the same steps above to go to Settings > Bluetooth & devices > Touchpad > Expand Touchpad Option.
- Check the option “Leave touchpad on when a mouse is connected“.

- Now your touchpad will no longer disable when you connected a mouse to your PC.
